Purpose of Ice Baths

An ice bath, also known as cold water immersion, is a therapeutic practice involving immersing your body in very cold water for a specific duration. The purpose of an ice bath is to provide various physical and mental benefits.
Here’s some information about its purpose, origin, and the science behind it.
Muscle Recovery
Ice baths are commonly used by athletes and fitness enthusiasts to aid in muscle recovery after intense workouts or competitions. The cold temperature helps reduce inflammation and muscle soreness, allowing for faster recovery.
Injury Treatment
Cold water immersion can be beneficial for treating acute injuries like sprains or strains, as it helps reduce swelling and numbs the area, providing pain relief.
Performance Enhancement
Some individuals believe that regular exposure to cold water can improve athletic performance by enhancing the body’s ability to adapt to stress and increasing tolerance to cold conditions.
Psychological Benefits
Ice baths are also associated with mental health benefits, such as reducing stress, improving mood, and increasing alertness and focus.
Origin of DIY Ice Baths
Cold water immersion has been used for centuries in various cultures around the world. Ancient Greeks, Romans, and Nordic civilizations practiced forms of cold water therapy for their perceived health benefits.
In Scandinavian countries, cold water plunges, known as “avantouinti” or “ice swimming,” have been a traditional part of sauna culture for rejuvenation and invigoration.
Science behind DIY ice baths
The science behind ice baths involves several physiological responses of the body:
Vasoconstriction
Exposure to cold water causes blood vessels to constrict, reducing blood flow to the extremities and helping to flush out metabolic waste products from the muscles.
Reduced Inflammation
Cold temperatures help decrease inflammation by reducing the production of inflammatory chemicals and enzymes.
Numbing Effect
Cold water immersion numbs nerve endings, providing temporary pain relief.
Hormonal Response
Cold exposure triggers the release of endorphins and other hormones associated with stress adaptation and improved mood.
Enhanced Circulation
After exiting the ice bath, the body experiences a rebound effect with increased blood flow to the extremities, which can aid in recovery.
It’s important to note that while DIY ice bath have potential benefits, they may not be suitable for everyone. If you have any underlying medical conditions or concerns, it’s best to consult with a healthcare professional before starting ice bath therapy.
12 Different types of Diy ice bath systems
Basic Ice Baths:
a. Traditional Bathtub: Use your existing bathtub and fill it with cold water and ice.
b. Plastic Container: Use a large plastic container or storage bin to create a makeshift ice bath.
c. Stock Tank: Repurpose a stock tank commonly used for livestock as an ice bath.
Outdoor Ice Baths:
a. Natural Water Source: Utilize a nearby natural water source such as a lake, river, or pond for your ice bath.
b. Wooden Barrel: Convert a wooden barrel into an outdoor DIY ice bath by filling it with cold water and ice.
c. Inflatable Pool: Set up an inflatable pool in your backyard and fill it with icy water.
Creative Ice Baths:
a. Ice-filled Bathtub with Decorations: Fill your bathtub with cold water and ice, adding decorative elements like flower petals or colorful ice cubes.
b. Ice Bath in a Clawfoot Tub: Use a vintage clawfoot tub for a unique and stylish ice bath experience.
c. Ice Bath with LED Lights: Add LED lights to your ice bath setup to create an atmospheric and visually appealing experience.
Portable DIY ice bath:
a. Portable Inflatable Ice Bath: Purchase or rent a portable inflatable ice bath designed specifically for cold water therapy.
b. Collapsible Ice Bath: Use a collapsible and portable container that can be easily assembled and disassembled for convenience.
c. Ice Bath Bag: Opt for a specialized ice bath bag that can be filled with ice and water, providing a portable solution.
Remember to prioritize safety and hygiene when setting up your ice bath, ensuring that the water is not too cold to avoid the risk of hypothermia. It’s also important to gradually acclimate your body to the cold water and monitor your time spent in the ice bath.
Please note that while these ideas can enhance your ice bath experience, it’s essential to exercise caution and prioritize your well-being when practicing cold water immersion.
How to build a DIY Ice Bath
Here’s how you can create each of these DIY ice bath systems:
1) Traditional Bathtub
- Start by cleaning your bathtub thoroughly to ensure it’s free of any residue or contaminants.
- Plug the drain to prevent the water from escaping.
- Fill the bathtub with cold water until it reaches a desired depth. You can adjust the water level based on your preference.
- Add ice cubes or bags of ice to the water, gradually increasing the amount until you reach the desired temperature. Remember, the colder the water, the more intense the ice bath.
- Stir the water gently to distribute the cold temperature evenly.
- Test the water temperature to ensure it’s suitable for your tolerance level. If it’s too cold, you can add warm water to adjust it accordingly.
- Once the ice bath is ready, carefully step into the bathtub and immerse yourself up to the desired level.
- Stay in the ice bath for the recommended duration, typically between 5 to 20 minutes, depending on your comfort and experience level.
- After the recommended time, slowly exit the ice bath and dry yourself with a towel.
2) Plastic Container DIY ice bath
- Find a large plastic container or storage bin that can accommodate your body comfortably.
- Clean the container thoroughly and ensure it’s free of any sharp edges or objects that may cause injury.
- Place the plastic container in a suitable location where you can comfortably sit or submerge your body.
- Fill the container with cold water, leaving enough space to add the ice.
- Add ice cubes or bags of ice to the water, adjusting the amount based on your preference and tolerance.
- Stir the water gently to distribute the cold temperature evenly.
- 7. Test the water temperature to ensure it’s suitable for your tolerance level, and adjust if necessary.
- Once the ice bath is ready, carefully lower yourself into the container, ensuring your body is submerged up to the desired level.
- Relax and remain in the ice bath for the recommended duration, typically between 5 to 20 minutes.
- Afterward, slowly exit the container and dry yourself with a towel.
3) Stock Tank DIY ice bath
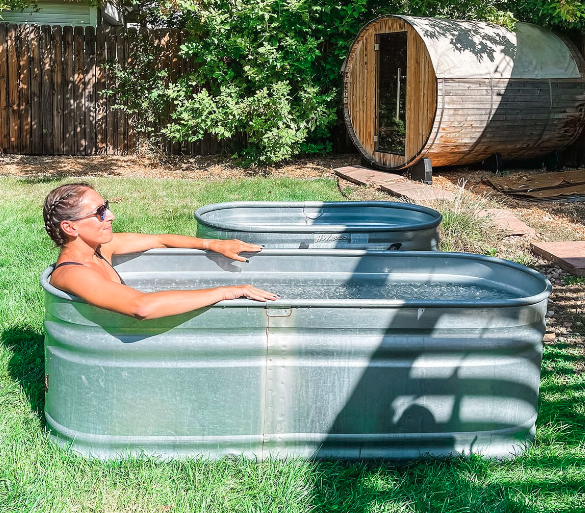
- Purchase or find a stock tank that is large enough to comfortably accommodate your body.
- Clean the stock tank thoroughly, removing any dirt or debris.
- Find a suitable location for the stock tank, either indoors or outdoors, with enough space for setup.
- Position the stock tank in the chosen location, ensuring it’s stable and level.
- Fill the stock tank with cold water, leaving enough space for the addition of ice.
- Add ice cubes or bags of ice to the water, adjusting the amount based on your preference and tolerance.
- Stir the water gently to distribute the cold temperature evenly.
- Test the water temperature to ensure it’s suitable for your tolerance level, and adjust if needed.
- Carefully step into the stock tank, immersing your body up to the desired level.
- Relax and remain in the ice bath for the recommended duration, typically between 5 to 20 minutes.
- When finished, slowly exit the stock tank and dry yourself with a towel.
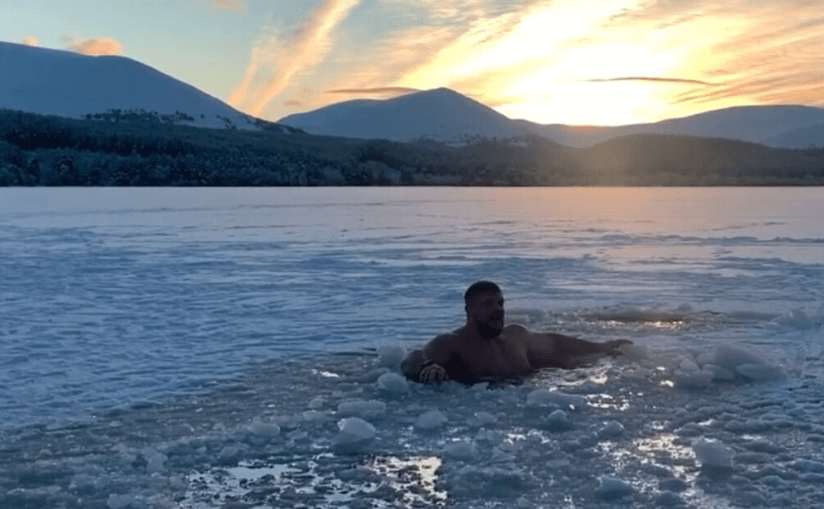
4) Natural Water Source DIY ice bath
- Choose a suitable natural water source: Find a nearby lake, river, or pond that is safe for swimming and has suitable depth and access.
- Test the water temperature: Measure the temperature of the water to ensure it is suitably cold for your ice bath. If necessary, add ice to lower the temperature.
- Prepare the area: Clear any debris or obstacles from the entry point of the water source to ensure safe access.
- Enter the water slowly: Carefully enter the water, gradually immersing your body up to the desired level. Take caution with slippery surfaces and be mindful of your safety.
- Stay within a safe duration: Limit your time in the water based on your comfort level and tolerance to the cold.
- Exit the water safely: Slowly exit the natural water source and dry yourself off with towels or warm clothes.
5) Wooden Barrel DIY ice bath
- Choose a suitable wooden barrel: Acquire a wooden barrel of appropriate size and depth. Ensure it is clean and free of any harmful substances.
- Prepare the barrel: Seal any leaks or gaps in the barrel to prevent water leakage. Sand down any rough edges to avoid splinters.
- Fill the barrel with water: Fill the wooden barrel with cold water, leaving enough space for the addition of ice.
- Add ice: Place bags or blocks of ice into the water-filled barrel. The amount of ice will depend on the desired temperature and your personal preference.
- Monitor the water temperature: Use a thermometer to check the water temperature and adjust by adding more ice if needed.
- Enjoy the ice bath: Carefully enter the barrel, immersing your body up to the desired level, and remain for your preferred duration.
- Exit and drain: After your ice bath, carefully exit the wooden barrel and drain the water, ensuring proper disposal.
6) Inflatable Pool
- Purchase or acquire an inflatable pool: Select an inflatable pool of sufficient size to accommodate your body comfortably. Ensure it is designed to hold water and is durable enough for icy conditions.
- Choose a suitable location: Find a suitable flat area in your backyard where the inflatable pool can be set up safely.
- Inflate the pool: Follow the manufacturer’s instructions to inflate the pool using an air pump or by manual inflation.
- Fill the pool with water: Fill the inflatable pool with cold water, leaving enough space for the addition of ice.
- Add ice: Place bags or blocks of ice into the water-filled pool, adjusting the amount based on your desired temperature.
- Monitor the water temperature: Use a thermometer to check the water temperature and add more ice if necessary.
- Enter and enjoy the ice bath: Carefully enter the inflatable pool, ensuring stability and balance. Immerse your body up to the desired level and enjoy the ice bath for your preferred duration.
- Drain the pool: After use, carefully exit the pool and drain the water completely, following the manufacturer’s instructions for deflating and storing the inflatable pool.
7) Ice-filled Bathtub with Decorations
- Fill your bathtub with cold water: Start by filling your bathtub with cold water, ensuring that the water level is appropriate for your immersion.
- Add ice cubes: Pour in a significant amount of ice cubes into the bathtub, distributing them evenly throughout the water.
- Decorate with flower petals: Sprinkle flower petals on the surface of the water. You can choose petals from your favorite flowers or opt for colorful varieties to enhance the visual appeal.
- Colorful ice cubes (optional): To add an extra touch of color, you can freeze water with food coloring in ice cube trays. Once frozen, add these colorful ice cubes to your ice bath.
8) DIY ice bath in a Clawfoot Tub
- Acquire a vintage clawfoot tub: Look for a vintage clawfoot tub that suits your preferences. You can find these tubs at salvage yards, antique shops, or online marketplaces.
- Prepare the tub: Clean and sanitize the clawfoot tub thoroughly before using it as an ice bath.
- Fill the tub with cold water and ice: Place the clawfoot tub in your desired location and fill it with cold water. Add a sufficient amount of ice to achieve the desired temperature.
- Customize the setup (optional): You can further enhance the experience by adding decorative elements, such as candles or plants, around the tub.
9) Ice Bath with LED Lights
- Prepare your ice bath: Fill your chosen ice bath container (bathtub, plastic container, or inflatable pool) with cold water and ice to the desired level.
- Acquire waterproof LED lights: Purchase waterproof LED lights that can be safely submerged in water. These lights are readily available in hardware stores or online.
- Place the LED lights in the ice bath: Submerge the LED lights at different locations in the ice bath container, ensuring they are securely sealed and waterproof.
- Turn on the LED lights: Activate the LED lights using the provided power source or batteries. Adjust the settings and colors according to your preference.
- Enjoy the atmospheric experience: Dim the room lights to create a more pronounced effect, and immerse yourself in the ice bath while enjoying the ambient glow of the LED lights.
10) Portable Inflatable DIY ice bath
- Materials Needed: Large inflatable pool or tub, air pump, tarp or groundsheet, cold water, ice.
- Steps:
- Purchase or find a large inflatable pool or tub that can accommodate your body.
- Find a suitable location for setting up the inflatable ice bath, preferably outdoors.
- Lay down a tarp or groundsheet to protect the surface beneath the inflatable bath.
- Inflate the pool using an air pump according to the manufacturer’s instructions.
- Fill the pool with cold water and add ice to achieve the desired temperature.
- Mix the water and ice thoroughly to distribute the cold temperature evenly.
- Test the water temperature to ensure it’s suitable for your needs.
- Carefully enter the inflatable ice bath and immerse yourself up to the desired level.
11) Collapsible DIY ice bath
- Materials Needed: Collapsible container (e.g., large storage bin or folding bathtub), liner (such as a waterproof tarp), insulation (such as foam insulation panels or insulating blankets), cold water, ice.
- Steps:
- Select a large collapsible container that is sturdy and can hold water without leaking.
- Line the container with a waterproof tarp or liner to prevent any leakage.
- If desired, add insulation to the sides and bottom of the container to help maintain the water temperature.
- Set up the collapsible container in a suitable location, preferably outdoors or in a well-ventilated area.
- Fill the container with cold water and add ice to reach the desired temperature.
- Stir the water and ice to ensure even distribution of cold temperature.
- Test the water temperature to make sure it’s safe for immersion.
- Carefully enter the collapsible ice bath and immerse yourself up to the desired level.
- Enjoy your portable collapsible ice bath!
12) DIY ice bath Bag
- Materials Needed: Large, durable, and waterproof bag (such as a camping dry bag or a heavy-duty plastic bag), insulation (such as towels or insulating blankets), cold water, ice.
- Steps:
- Select a large, waterproof bag that can hold water without leaking.
- Ensure the bag is durable enough to handle the weight of water and ice.
- If desired, wrap insulation materials, such as towels or insulating blankets, around the bag to help maintain the water temperature.
- Place the bag in a suitable location, ensuring it is stable and won’t tip over during use.
- Fill the bag with cold water and add ice to achieve the desired temperature.
- Seal the bag securely, ensuring it is watertight and won’t leak.
- Test the water temperature to verify it’s safe for immersion.
- Carefully enter the ice bath bag and immerse yourself up to the desired level.
- Enjoy your portable ice bath experience!
Remember to exercise caution when dealing with cold water and ice to avoid slipping or injuries. Additionally, monitor your body’s response and adjust the water temperature and duration according to your comfort level and any specific recommendations from a healthcare professional.
Final Thoughts
In conclusion, building your own DIY ice bath can be an exciting and rewarding project. Whether you opt for a basic setup, get creative with decorative elements, go for an outdoor experience, or choose a portable design, each ice bath idea offers its unique benefits and possibilities.
By understanding the purpose, origin, and science behind ice baths, you can confidently embark on your DIY ice bath journey. Remember to prioritize safety, gradually acclimate your body to the cold, and consult a healthcare professional if you have any concerns or underlying health conditions.
We wish you the best of luck as you embark on your DIY ice bath adventure. May your ice bath creations provide you with the physical and mental benefits you seek. Enjoy the invigorating experience of cold water immersion and embrace the rejuvenation it brings to your body and mind. Stay cool and stay well!